Mtune Characterization Wizard
First step of load-pull is to pre-characterize the automated tuner. This step needs an automated tuner and a calibrated VNA.
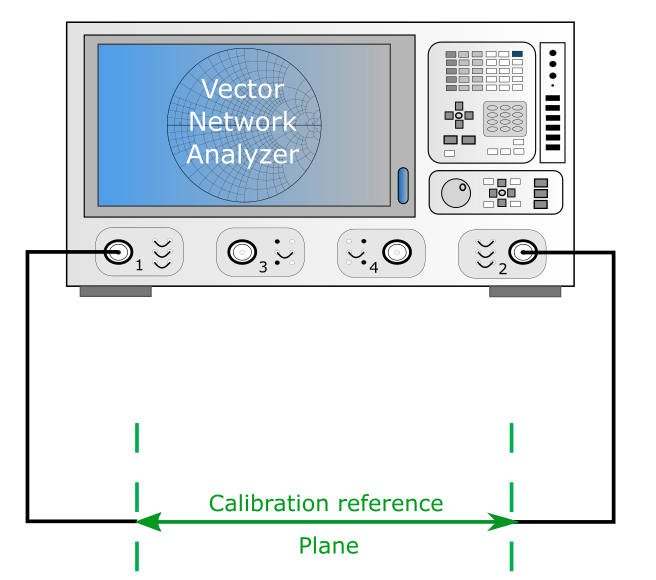
Set the VNA using internal coupler (to measure usual S-parameters: jumpers plug on the front panel of the VNA), and do the VNA calibration at the desired frequencies.
Maury Mtune 2
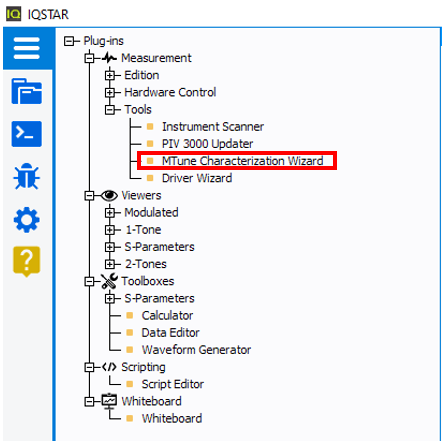
Run the ‘Mtune Characterization Wizard’ tools from IQSTAR directly.
Fill the Tuner Characterization tool with the information of the VNA and the tuner to calibrate.
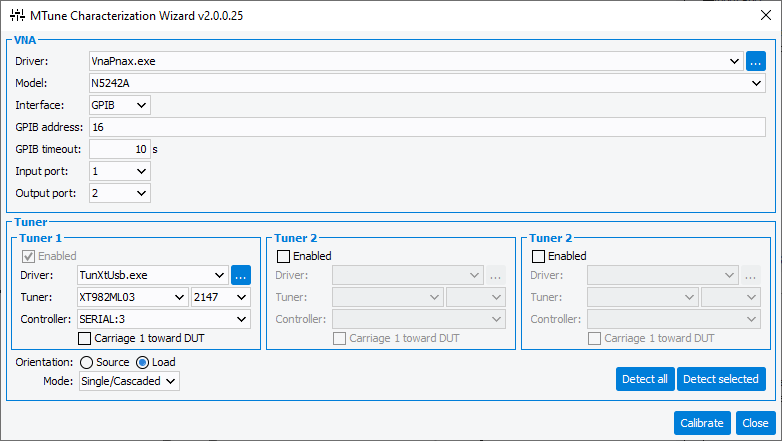
Once all the information is filled and the tuner is detected click on ‘Calibrate’.
If the VNA is already calibrated at the frequency of interest, they will be display when clicking on “Re-Read VNA frequencies”. Otherwise add frequencies using the options ‘Add Frequency’ or ‘Add Frequency Range’ and click on ‘Write new VNA frequencies’ to send the new frequencies list to the VNA. The IF Bandwidth must also be set at this step.
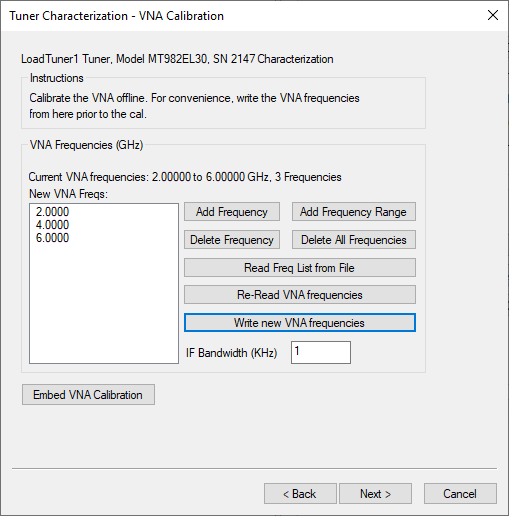
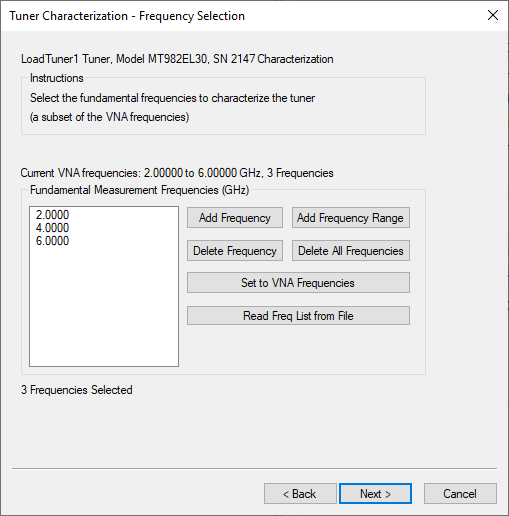
After this step if the VNA is not already calibrate proceed to its the calibration. Once the VNA is calibrated; click next in the ‘Tuner Characterization’ tool. The VNA will display all the frequency actually corrected. Remove the frequency that will not be used as controlled frequency by the tuner.
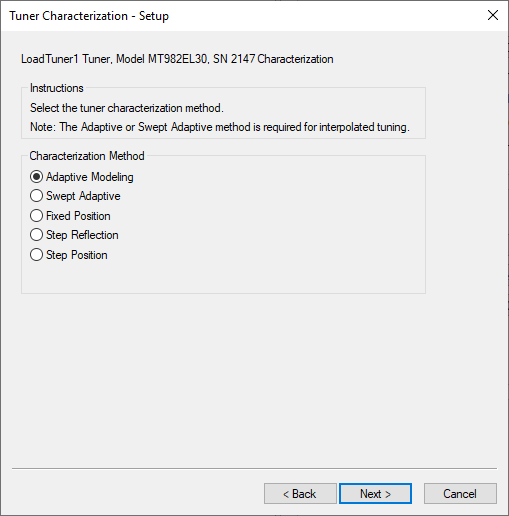
Set the tuner characterization methods: Adaptive Modeling, Step Reflection, Step Position and Fixed Position.
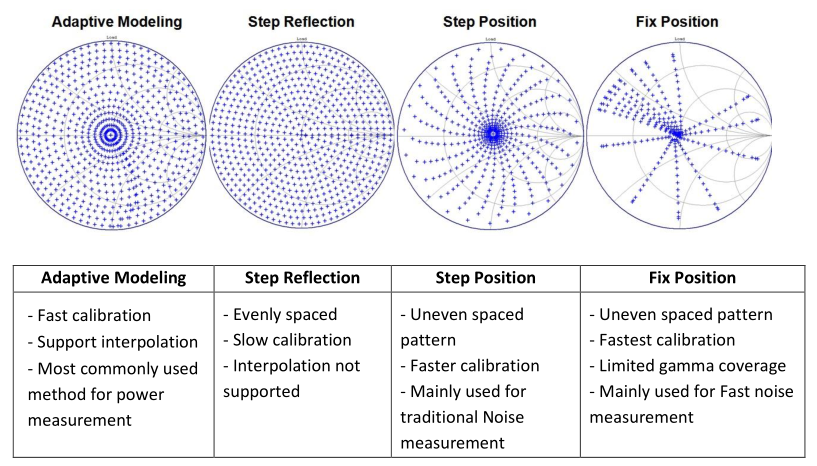
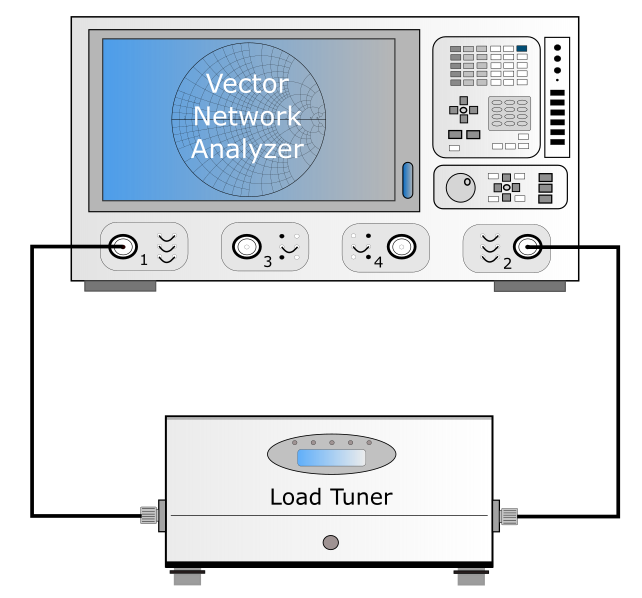
This section will only describe Adaptive Modeling method. Connect the tuner to the VNA, ‘DUT side’ of the tuner will always be connected to VNA port1.
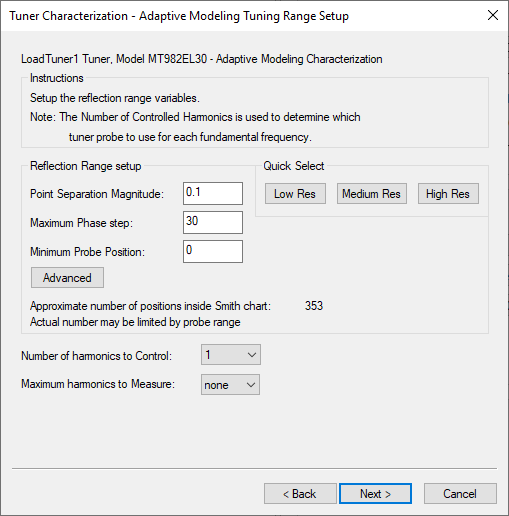
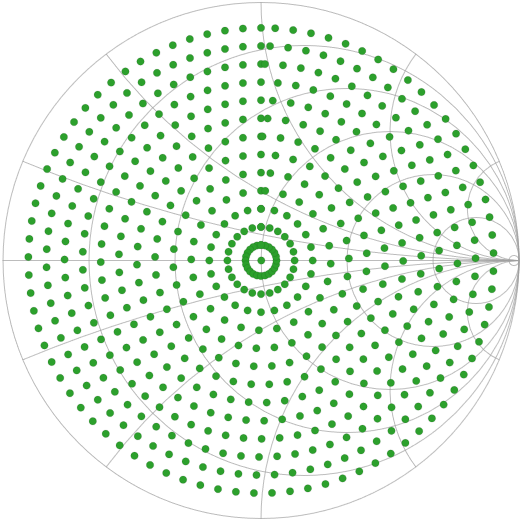
At this step, chose the density by selecting the separation magnitude and the maximum phase, the approximated number of impedances. If the tuner is set as load tuner for VNA base load-pull, it is not necessary to have a huge density of points because the extrapolation could be used, and the Gamma load will be measured in real-time during load-pull.
- Number of harmonics to Control: 1
- Maximum harmonics to Measure: None
The final step consists in entering the file name of the tuner calibration file.
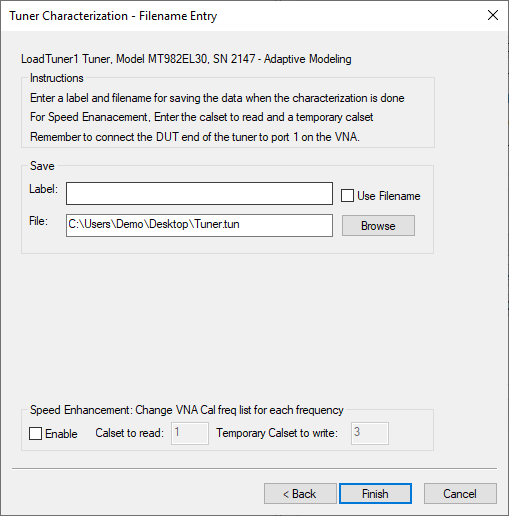
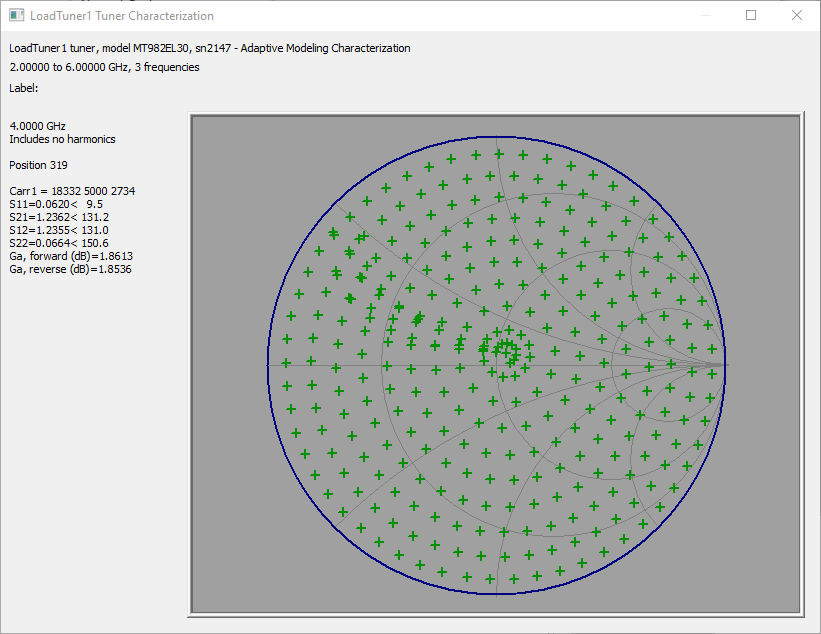
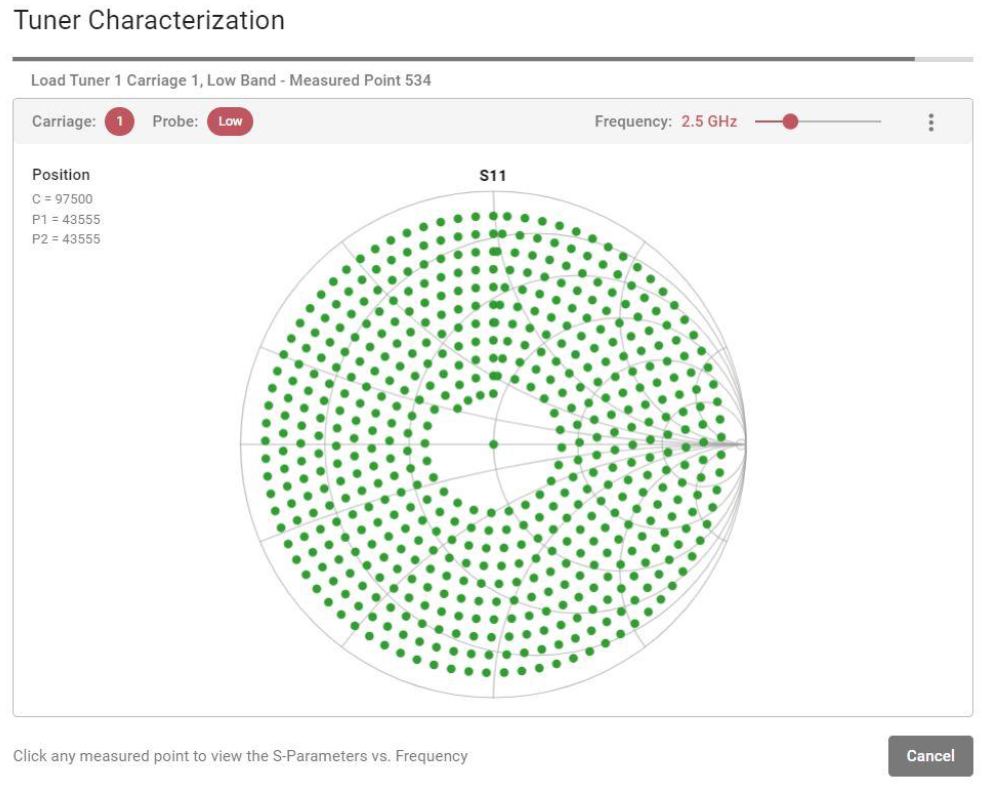
The calibration will start, for each mechanical position of the tuner; the VNA will record the S-parameters of the Tuner and save this one into the tuner calibration file.
Maury Mtune 3
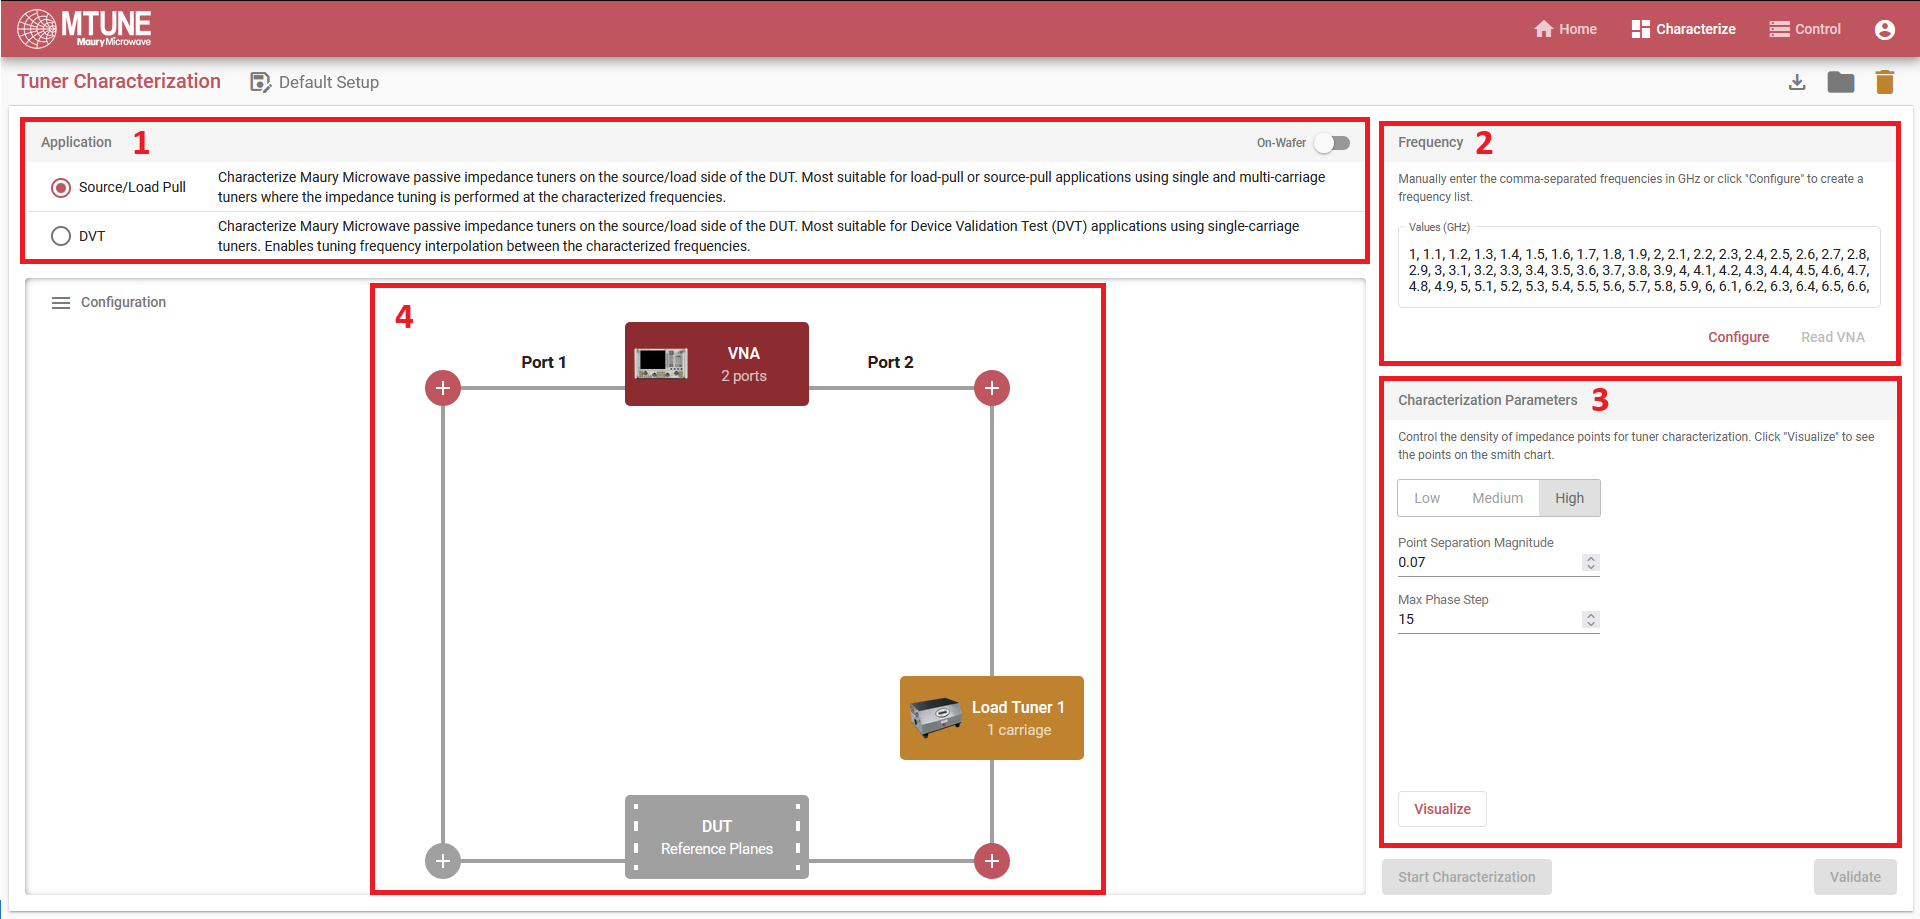
- Application : Allows you to change between classic Source/Load Pull characterization and DVT (Device Validation Test).
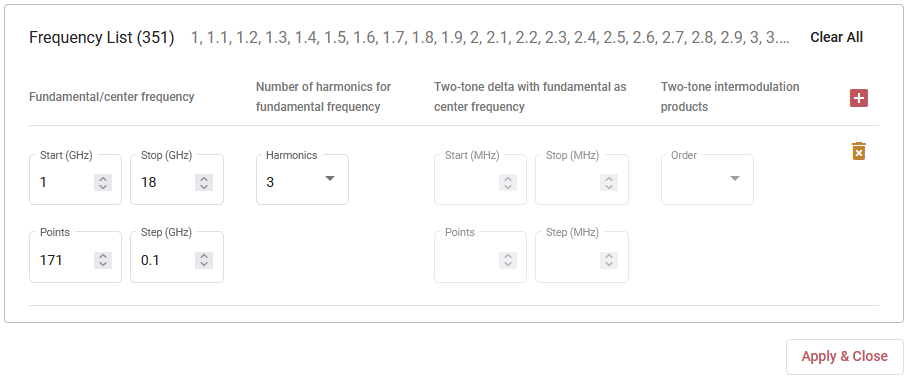
- Frequency : The "Configure" button of the Frequency panel
opens a pop-up window to configure the frequency list to characterize the
tuner.
- Characterization Parameters : The "Characterizarion
parameters" panel is used to define the density of the characterization of
the tuner. There is 3 defaults values listed in the table below :
Low Medium High 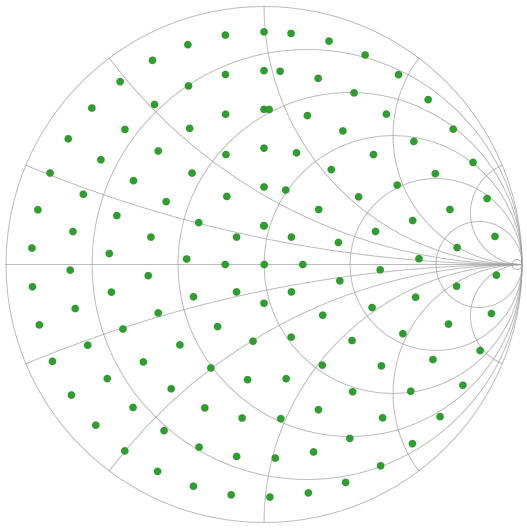
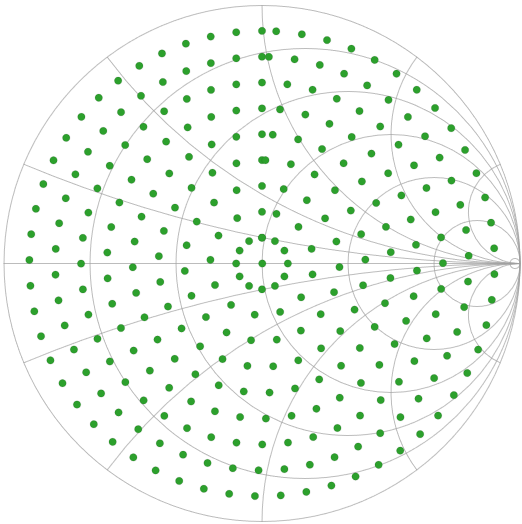
It is also enabled to select a custom point separation magnitude / max phase step to create a custom patern to characterize the tuner.
- Configuration : The last step is the configuration of the VNA
and the tuner :
- Load Tuner 1 :
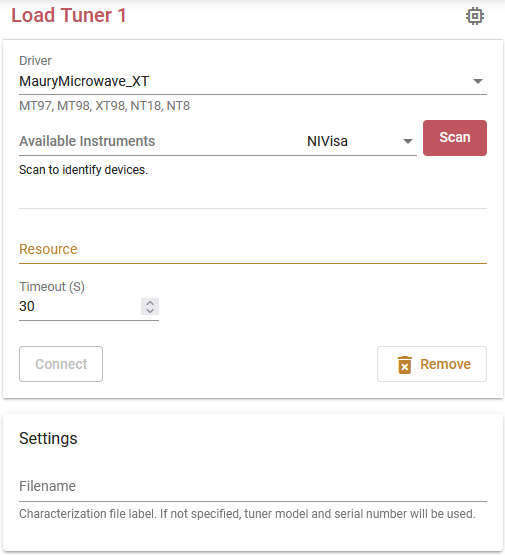
Tuner have to be configured throw this interface. To do so, select the appropriate driver for the tuner, the communication protocol (NIVISA, USB, IP) and then specify the address of the tuner. To check if all these infromations are good, the "Connect" button establish a simple connection with the tuner. - VNA :
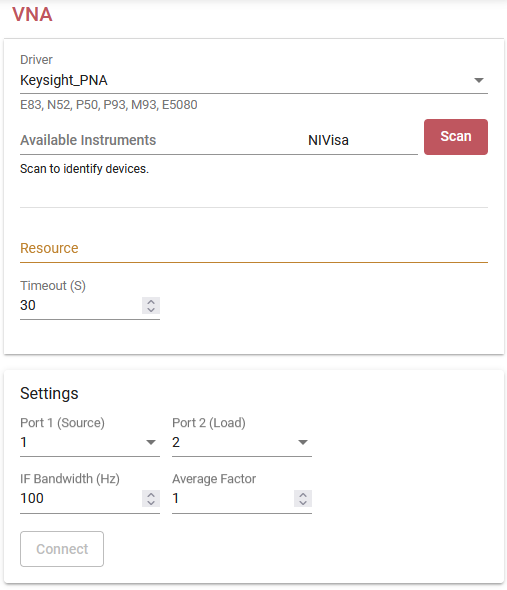
The interface is similar as the one to configure the tuner, but it will configure the VNA used for the characterization.It also enables to select the Source and Load port of the VNA to connect te tuner, the IF Bandwidth and the averaging factor.
- Load Tuner 1 :
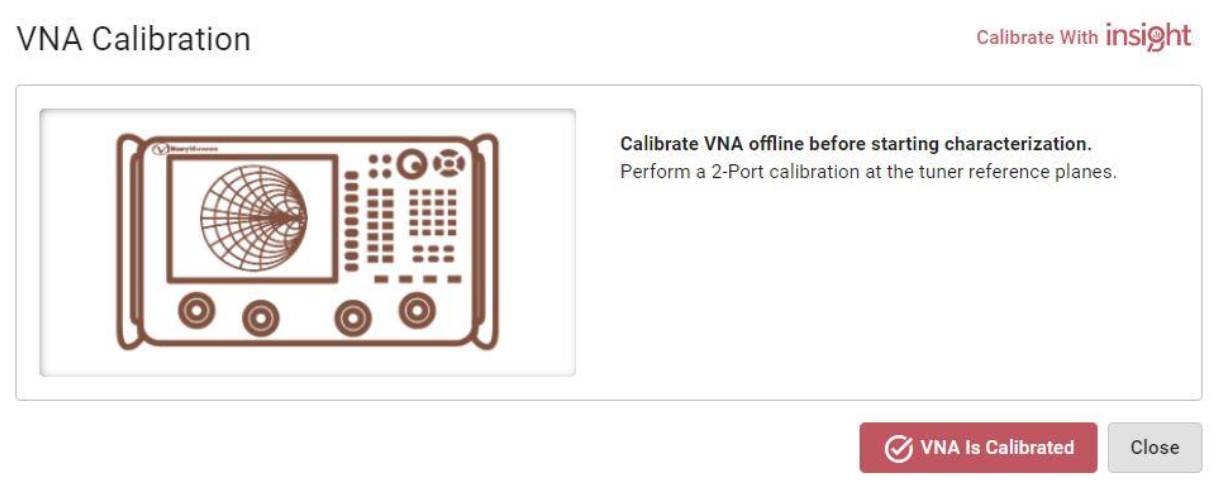
At this step, a Full-2-Port calibration on the VNA interface will be needed to go thru the characterization process. The calibration will then start, for each mechanical position of the tuner; the VNA will record the S-parameters of the Tuner and save this one into the tuner calibration file.
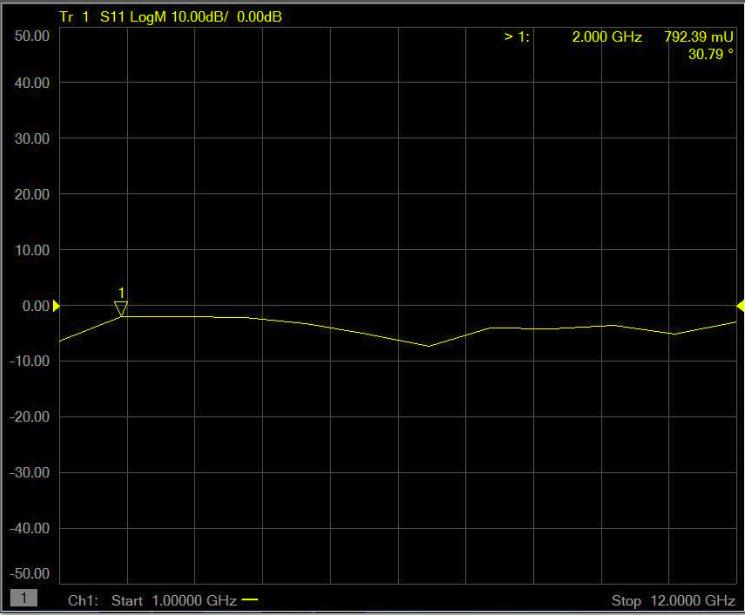
Check gamma presented at the DUT reference
Initialize the VNA and calibrate at the probe tip at the fundamental frequencies of the tuner. While touching down on a THRU after the calibration, click on the Load Tuner in the Schematic. Then configure the tuner driver including the pre-characterization file (*.tun), following Maury Tuners Setup Instructions & Driver Details. Finally click on control to enter to the tuner control dialog.
Within the dialog, select the fundamental frequency and enter target gamma (mag=0.8 & phase=30° in this example), and click on “Move”. The load gamma seen at the DUT reference on the load should be mag=0.8 & phase=30°.
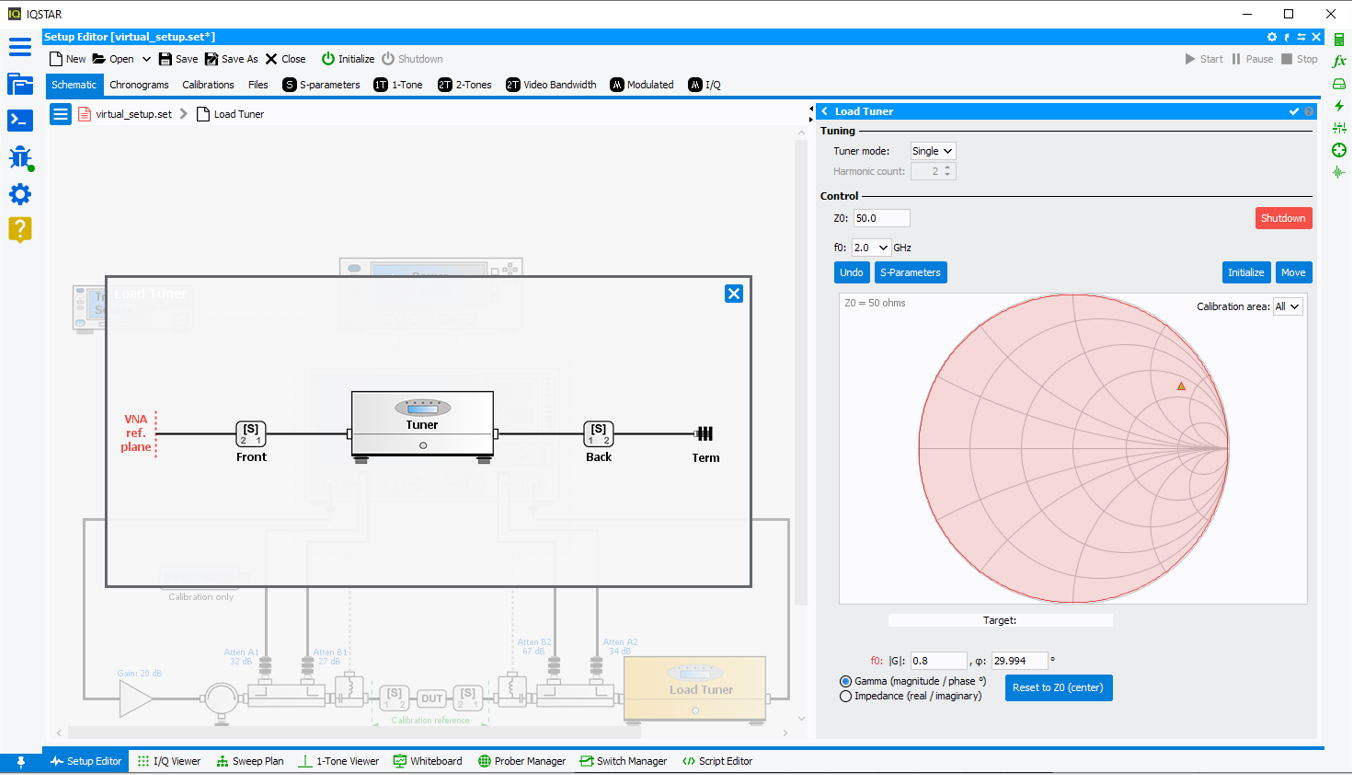
Now verify the gamma at the DUT reference with the VNA. Put a marker at the fundamental frequency of the tuner and put it in linear Mag/Phase format and check if it agrees with the gamma set at the tuner control dialog.