
Overview
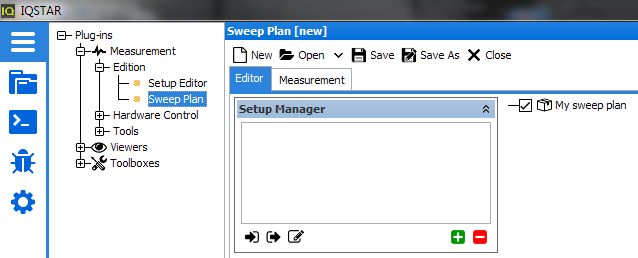
General organisation of the sweep plan
- Available actions: the list of all the available actions to program the sequence. From this panel, select the actions to be added to the sweep plan or drag and drop it at the desired position
- Sweep Plan script: here is the sweep plan sequence that will be launched when clicking on start
- Action configuration: select an action will automatically open the
configuration panel in this part
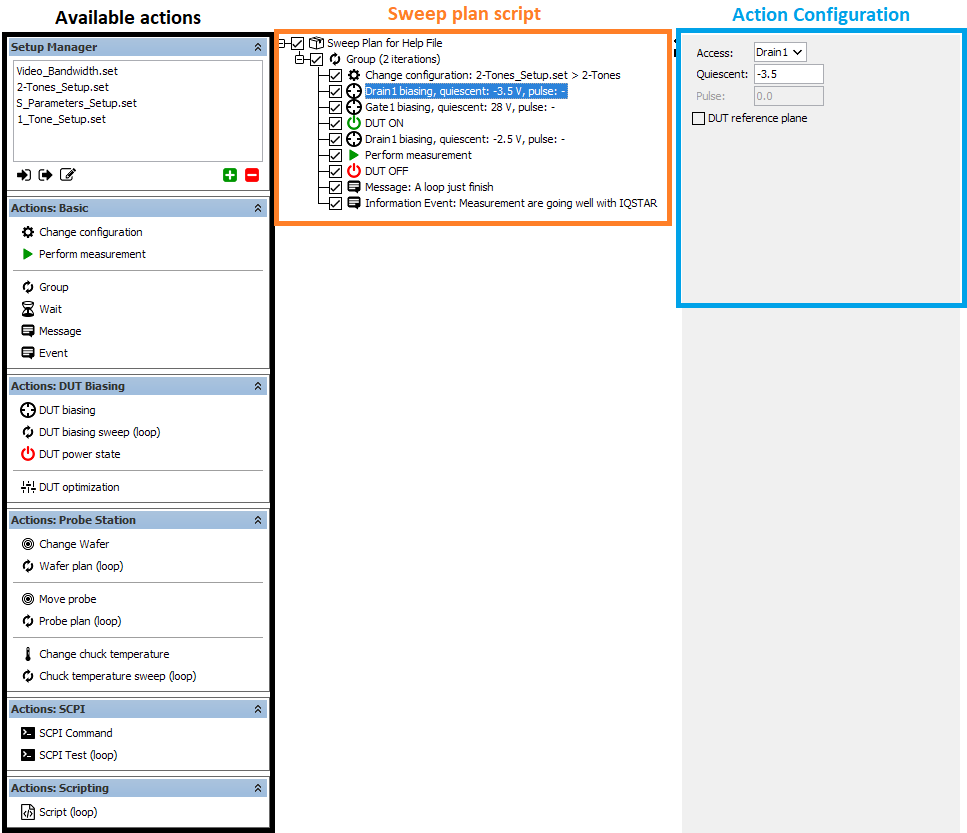
At the bottom of the sweep plan window, there are several icons  . These icons are
very useful in order to write the sequence. With that, it's possible to copy/paste
action or group of actions (parent->children), to delete actions, and also to modify
the place of an action in the sequence.
. These icons are
very useful in order to write the sequence. With that, it's possible to copy/paste
action or group of actions (parent->children), to delete actions, and also to modify
the place of an action in the sequence.
 browse and add the setup, using
  delete the selected
setup:
delete the selected
setup: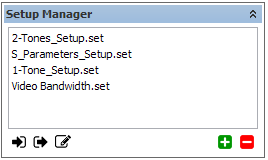
- Import the current setup (from the schematic setup editor of IQSTAR) in the Setup Manager of the sweep plan
- Export the setup to the schematic setup editor of IQSTAR
- Rename the setup
Configuration of sweep plan
The interest of the sweep plan is to add actions (listed on the left side) to customize a given measurement configuration, and to easily program a complete sequence of tests.
Each action located after the "Change measurement configuration" field will update the measurement process by modifying the frequency, the bias, or any other parameters and will perform the desired measurement using these new conditions.
There are two different actions:
- Punctual: these actions are just done once there is no loop, as an example DUT biasing only set the desired level to a power supply
- Iterative (loop): these actions may generate a sweep, as an example DUT biasing sweep allow the sweep of the level to a power supply

- Load and Set all the parameters of 'change configuration' into the instruments
- Set all the power supplies ON (make sure the DUT can handle 0V at all ports)
- Apply 1st input voltage value
- Apply 1st output voltage value
- Start the 1-Tone measurement
- Apply 2nd input voltage value (output is still on the 1st value)
- Start 1-Tone measurement
- And so on for all the biasing combinations…

- Load and Set all the parameters of 'change configuration' into the instruments
- Set all the power supplies ON (take care if the DUT could handle 0V on all ports)
- Apply -2.5V at the input
- Start the 1-Tone measurement